
In this guide, you'll find answers to frequently asked questions about sharing documents in OneDrive and SharePoint.
| HTML Wrap | ||
|---|---|---|
| ||
| Info |
|---|
You can share files in different ways (e.g. from SharePoint, OneDrive, document, etc.), it is important to make sure who you are sharing with. The IT department recommends using sharing with specific people. This way, you can be sure that only selected people can access the document. |
FAQ
| Note | ||
|---|---|---|
| ||
Failide ja dokumentide jagamine OneDrive'is ja Sharepointis English version can be found here: KKK – Failide ja dokumentide jagamine (OneDrive, SharePoint). |
| Table of Contents |
|---|
Introduction
Here you will find answers to frequently asked questions about document sharing.
KKK – Failide ja dokumentide jagamine
| Expand | |
|---|---|
|
| |
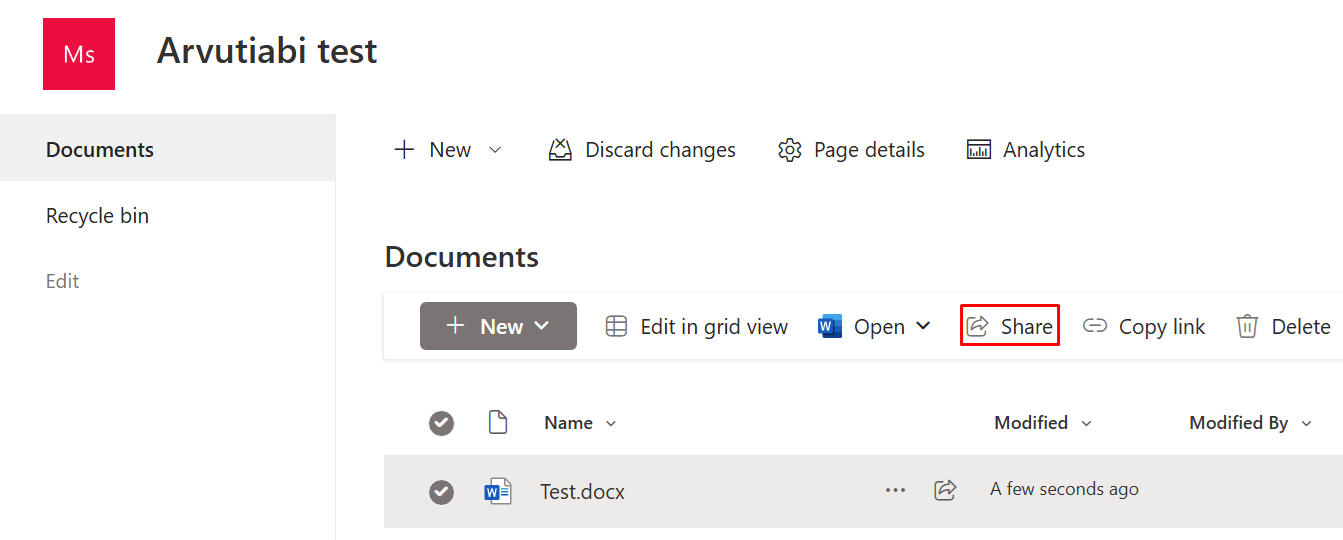
Share your documents
Check Share your documents
Create a shareable link
Check Create a shareable link
| Expand | ||
|---|---|---|
|
|
Shared documents can be found in the Shared subsection of OneDrive.

How to properly share documents?
OneDriveSharePointFor more information, check Organize and control file sharing in OneDrive and How to check your membership and ownership status in Sharepoint. |
| Expand | ||
|---|---|---|
| ||
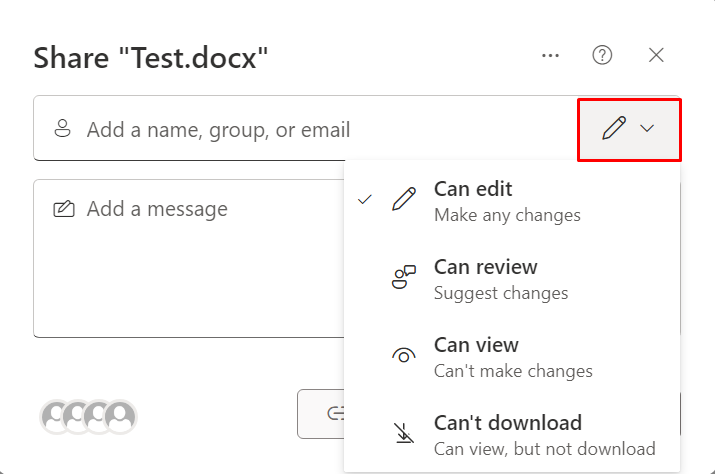
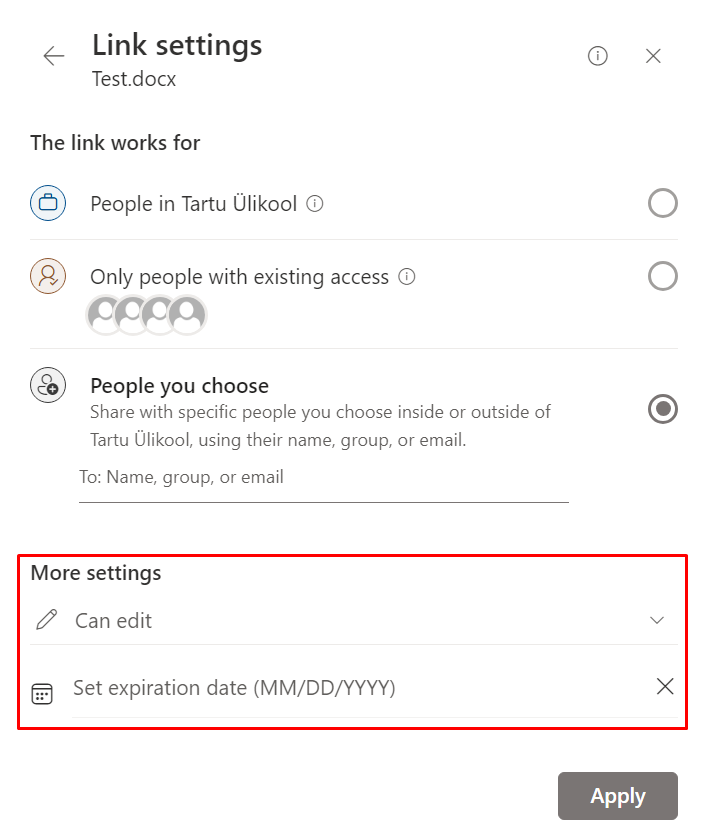
Sharing a document
Sharing a link
|


|
|
|
|


- Allow editing - if there is no check mark, the other party can only read the document and not edit it.
- Block download - turning it on allows you to disable the download - the document can only be viewed or edited online.

Kuidas saan näha, kellega on dokument jagatud?
Access can be seen and managed using the ![]() button in the document by selecting Has Access → Manage access.
button in the document by selecting Has Access → Manage access.


Kuidas jagada faile väljapoole ülikooli?
| Expand | ||
|---|---|---|
| ||
|
There are two ways to share files outside |
UT: |
|
|
|
|
|
|
|
|
|
|
|
|
|

