
Ühendumine eduroam'i (Windows 8 ja 10)
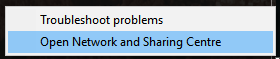
1. Ava Network and Sharing Center. Selleks tee kellaja juures oleval võrguühenduse ikoonil hiirega vasak klõps ja tee vastav valik.
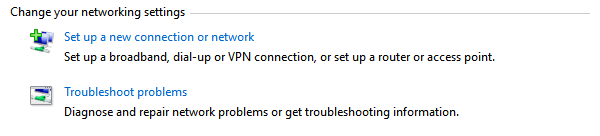
2. Avanenud aknas vajuta valikule Set up a new connection or network.
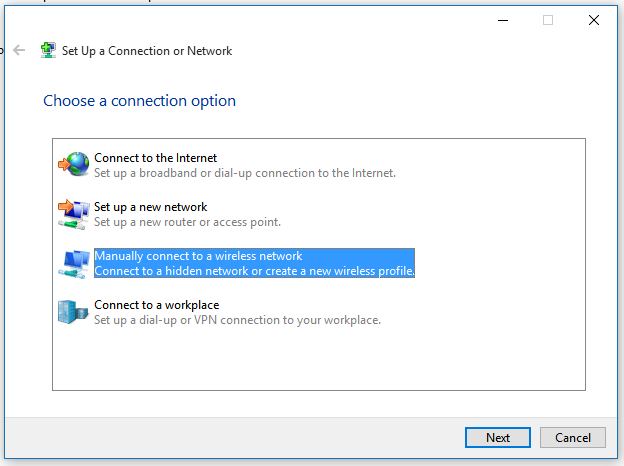
3. Avanenud aknas vali loetelust Manually connect to a wireless network ja vajuta Next.
4. Järgmises aknas sisesta võrgu nimeks eduroam ja Security type'ks määra rippmenüüst WPA-2 Enterprise. Peale seda vajuta Next.

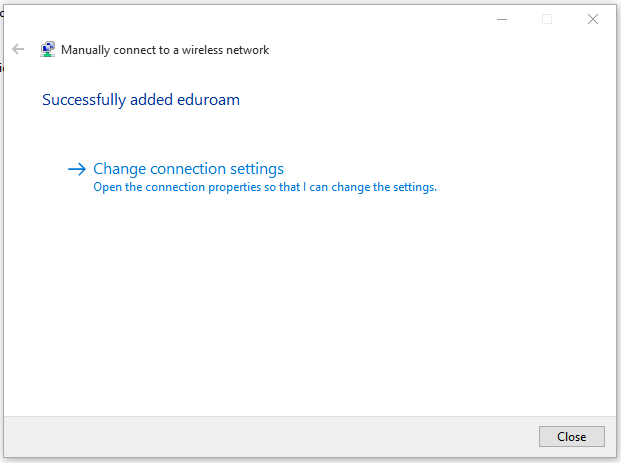
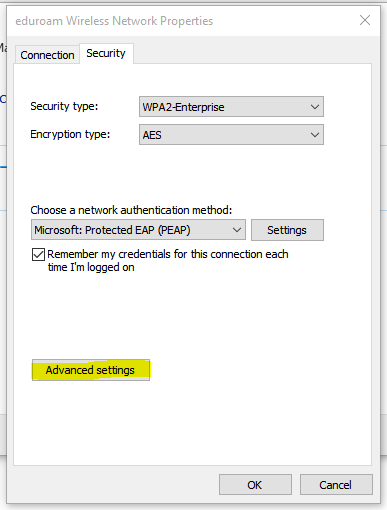
5. Vajuta valikul Change connection settings.
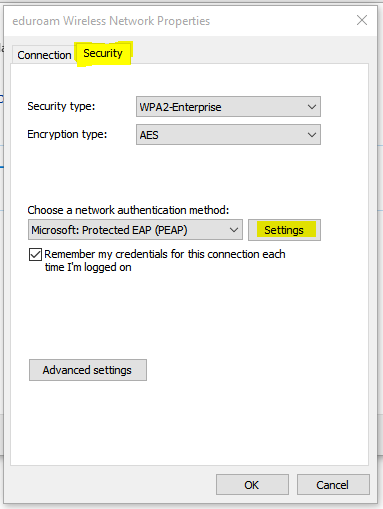
6. Avanenud aknas vali vaheleht Security. Veendu, et Choose a network authentication method rippmenüüs oleks valik Microsoft: Protected EAP (PEAP) ja vajuta nupule Settings.
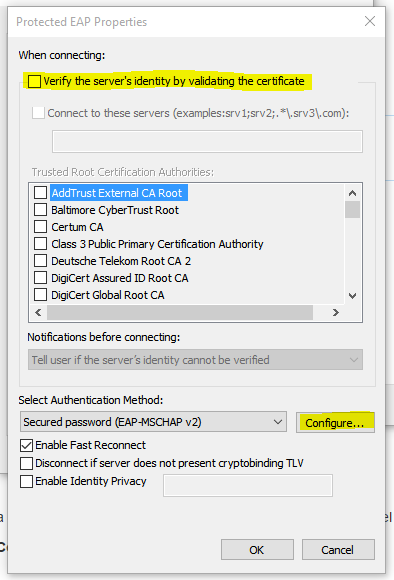
7. Avanenud aknas eemalda linnuke valikult Verify server's identity by validating the certificate. Seejärel vajuta nupule Configure.
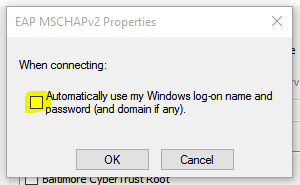
8. Avanenud aknas eemalda linnuke ja vajuta OK.
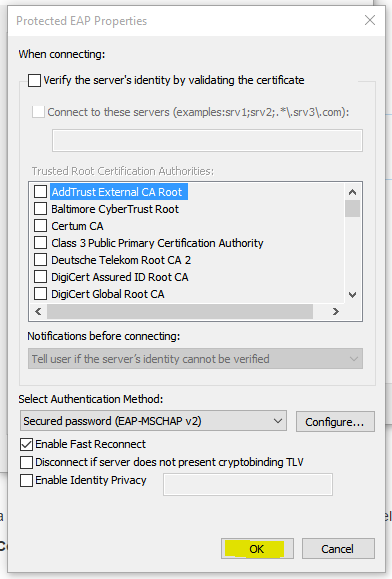
9. Vajuta OK.
10. Vajuta nupule Advanced settings.
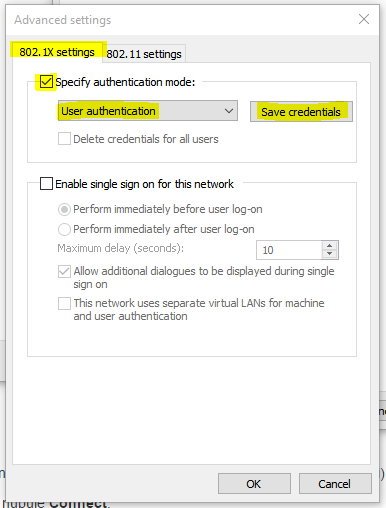
11. Pane linnuke lahtrisse Specify authentication mode ja vali rippmenüüst User authentication. Seejärel vajuta nupule Save Credentials.
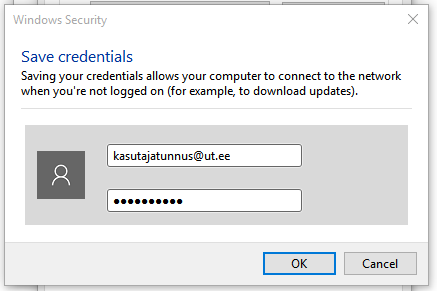
12. Peale Save Credentials nupule vajutamist, sisesta avanenud aknas oma kasutajatunnus kujul kasutajatunnus@ut.ee ja parool vastavatesse lahtritesse ja vajuta OK.
13. Sulge kõik aknad vajutades nuppudele OK ja Close. Arvuti peaks end hetke pärast võrguga ära ühendama.
Connecting to eduroam (Windows 8 and 10)
1. Open the Network and Sharing Center. Right click on the network connection icon and choose the Open Network and Sharing Center from the context menu.
2. Click on Set up a new connection or network.
3. Choose Manually connect to a wireless network from the list and click Next.
4. Enter eduroam as the network name and set the Security type to WPA-2 Enterprise. Click Next.
5. Click on Change connection settings.
6. Open the Security tab. make sure the Choose a network authentication method is set to Microsoft: Protected EAP (PEAP) and click Settings.
7. Remove the tick from the Verify server's identity by validating the certificate checkbox. After that, click the Configure button.
8.Remove the tick from the checkox that says Automatically use my Windows log-on name and password and click OK.
9. Click OK.
10. Click on Advanced settings.
11. Tick the checkbox that says Specify authentication mode and choose User authentication from the drop-down menu. After that, click on Save Credentials.
12. After clicking Save Credentials enter your username in the form username@ut.ee and your password in the designated fields. Click OK.
13. Close all the open windows by clicking OK and Close. In a moment your computer will establish the connection, if all of the settings are correct.
This page has no comments.