This guide provides instructions on how to set up Microsoft Outlook on a Windows operating system.
| HTML Wrap | ||
|---|---|---|
| ||
| Note |
|---|
| Note |
|---|
Eestikeelne versioon asub siin: Outlooki seadistamine Windowsis. |
| Table of Contents |
|---|
When using cloud service, |
applying two-factor authentication |
is mandatory: |
Setting up
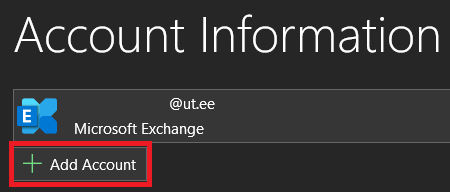
These instructions explain how to add your first account to Outlook. If you have previously added an account to Outlook, You need to click File in the top left corner of window and then choose Add account. After that, follow the instructions below from step 1.


In the Account Configuration, choose Yes and click Next.

When the computer is connected to the universty's domain, the settings will be applied automatically.

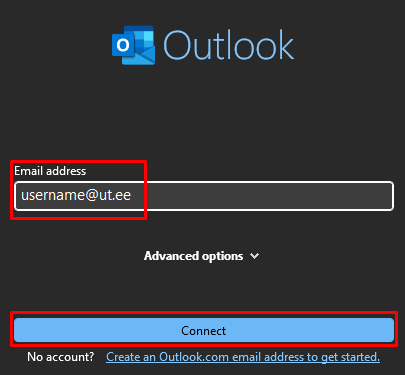
When the computer is not connected to the universty's domain, you need to enter your name, your e-mail address, and your password and click Next.

Tick "Don't ask me about this website again" and click Allow.

You will be prompted for the username and password. Computers outside the University's domain add your username as firstname.lastname@ut.ee, but it is required to write your university's account. For Windows 10, click More choices.

For Windows 10, click Use a different account, then you can write your username. Write your username as username@ut.ee and write your University account's password.

Next window tells you of a successful configuration, click Finish.

NB! Make sure your software is updated to the latest version.
Guides
| Expand | ||
|---|---|---|
| ||
|


| Expand | ||
|---|---|---|
| ||
|