
Introduction
To use the proxy server, the operating system and web browser settings must be adjusted as follows:
- Configure the proxy based on your operating system.
- Configure the proxy server based on your web browser.
System Proxy Setup Guide (Linux)
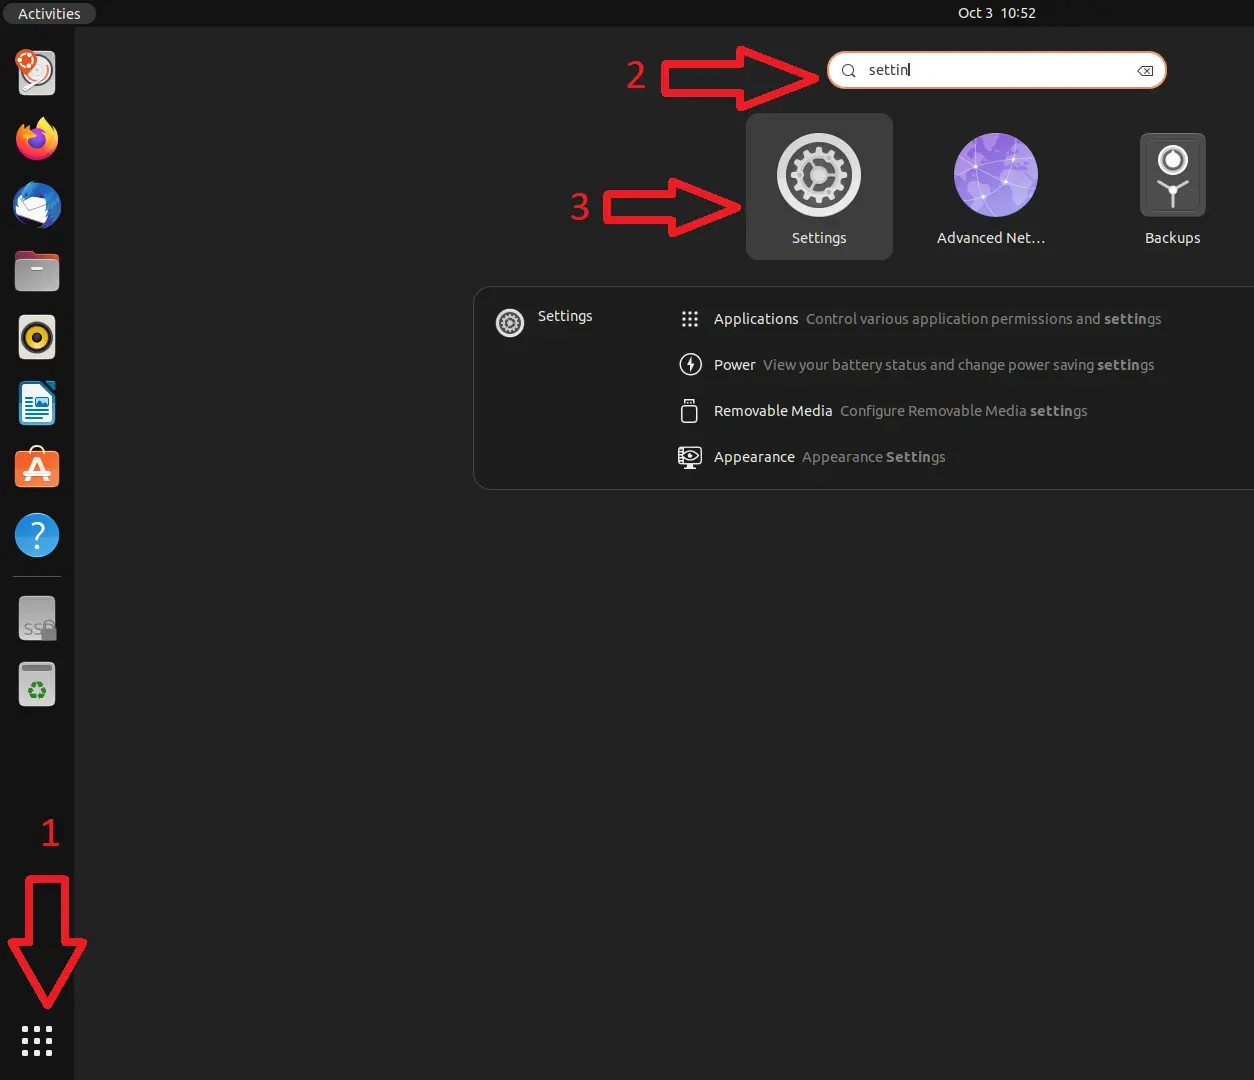
- Open show applications (9 dots), type Settings into the search bar and open Settings.
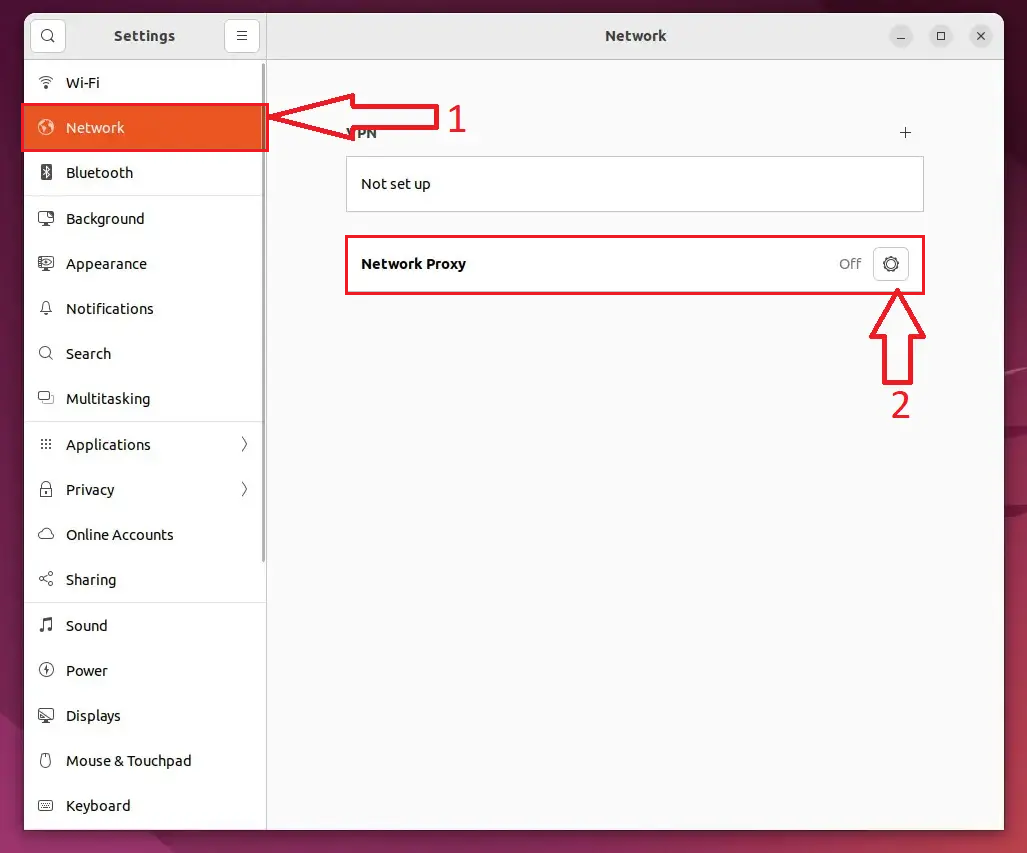
- Select Network → Network Proxy > Network Proxy settings.
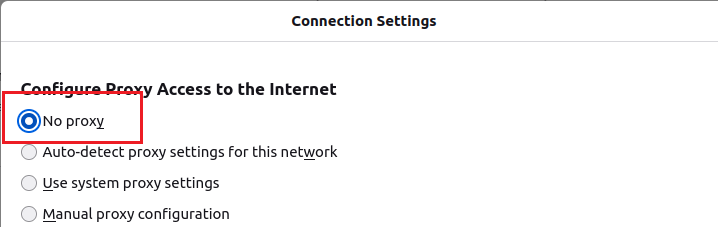
- Configure:
- automatic
- in the Configuation URL field, enter http://www.ut.ee/utlib.pac.
- to close, click
 in the top right

Activating (Mozilla Firefox)
- NB! Before setting up the proxy for Mozilla Firefox, make sure that you have set up the operating system's proxy settings.
- In the Firefox menu, select Options (three parallel lines at the top right of the screen) → Settings.

- Click the General button in the sidebar, then scroll all the way down. In the section Network Settings, click the Settings... button.

- In the dialog window that opens, select Automatic proxy configuration URL and enter the value http://www.ut.ee/utlib.pac.

- Click OK and close the preferences dialog from the corner of the window.
Deactivating (Mozilla Firefox)
- To stop using the university proxy, open the same dialog and select No proxy.
- Click OK and close the preferences dialog from the corner of the window.
Activating (Google Chrome/Chromium)
- After performing the operating system's proxy settings, Google Chrome automatically uses the system settings.
Deactivating (Google Chrome/Chromium)
- Google Chrome uses the proxy settings of the operating system (Linux). To deactivate, the Linux operating system's proxy must be deactivated.
This page has no comments.