Page tree

University of Tartu IT wiki

Versions Compared

Key

  • This line was added.
  • This line was removed.
  • Formatting was changed.

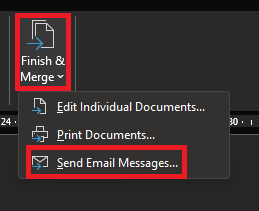
In this guide, you will find instructions about sending a mass e-mail in Outlook.

HTML Wrap
classbutton button1

(info) Eesti keeles


Note
Note
iconfalse

Eestikeelne juhis.Image Removed  Eestikeelse juhendi leiad siit: Massmeili saatmine.

Table of Contents

Introduction

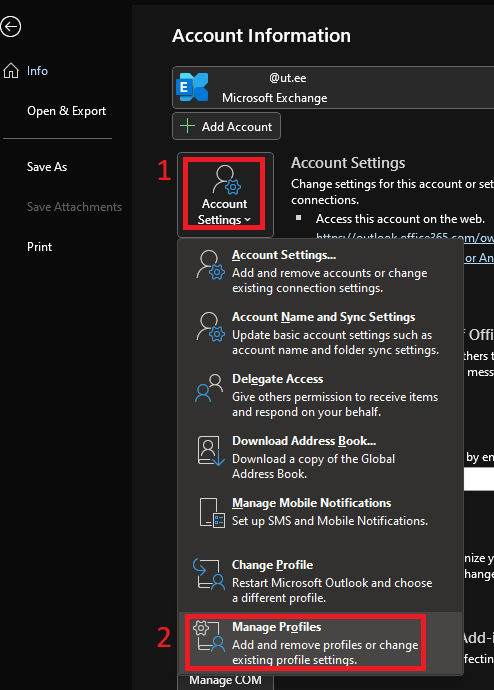
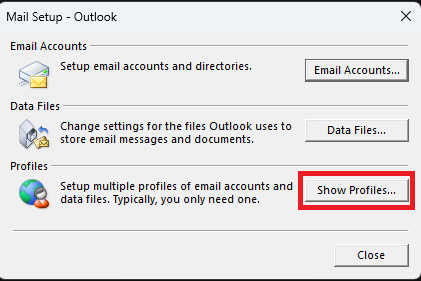
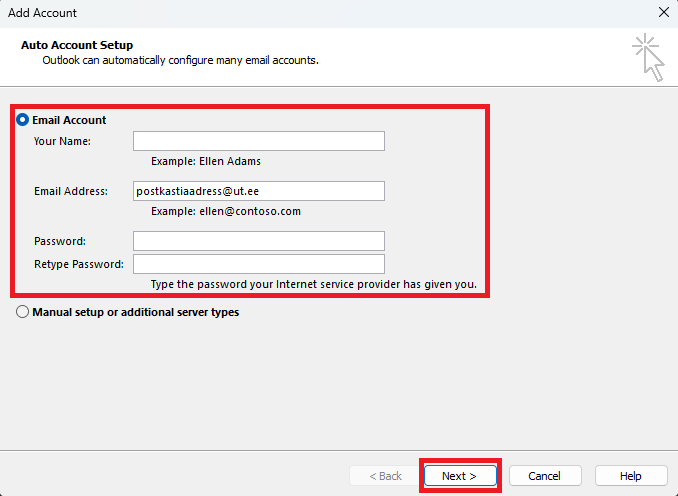
The settings must be made in the following order:

  1. Microsoft Outlook
  2. Microsoft Word


NB! When the letters have been sent, it is recommended to change the settings back to the way they were before.

Guides


Expand
titleStep 1
-
: setting up Microsoft Outlook
  1. If you use a personal mailbox and replies to sent letters can come to the same mailbox, then you only need to follow the steps on Word's side.
  2. If you use a shared mailbox, you need to create a new profile and attach it only to this mailbox. To do this, select File→ Account Settings→ Manage Profiles.
Image Removed
  1. Image Added
  2. A new window will open, in which select Show Profiles.
Image Removed
  1. Image Added
  2. Next, select Add. Give the new profile a name. Press OK.
    According to your wish, choose to ask which profile to use every time you open Outlook (Prompt for a profile to be used) or select the created profile from the drop-down menu as the default option (Always use this profile).
    Click OK and Close in the previous window.
    Image Modified
  3. A new window will open, where you have to fill in the cells as follows:
    Your Name: First and last name.
    Email address: the email address of the mailbox to be added.
    Password (two boxes): UT personal account password twice.
    Click Next.
    In the next two windows, press Next and Finish again.
Image Removed
  1. Image Added
  2. If O365 asks to log in, write the user ID in the form userid@ut.ee, password and perform two-step authentication.
  3. When you restart Outlook according to the choice made in point 4, a new profile will immediately open or ask you which profile to use.
  4. Once the profile has been selected and Outlook has loaded the profile, you can proceed to the Word settings.
  5. If the replies to sent letters must go to some other email address, a corresponding rule must be created in Outlook.
    Select Home→ Rules→ Manage Rules & Alerts.
Image Removed
  1. Image Added
  2. In the new window, select the mailbox to which the rule must apply (Apply changes to this folder).
  3. To create a new rule, press New Rule. A new window will open, where you can select the appropriate criteria as shown in the picture below in the Rule description cell. To change the attributes of the criteria, click on the blue text after the corresponding criterion.

Image Removed

    • The first line specifies which email addresses the rule applies to.
    • The second line specifies the time period when the rule applies. If no time limit is needed, do not add this criterion.
    • The third line specifies the email address where the replies should go.
    • The fourth line deletes the received message from the original mailbox. If the copy must remain, do not add this criterion.
      Image Added
  1. Once the rule is set, press OK and move to Word settings.


Expand
titleStep 2
-
: setting up Microsoft Word
  1. Open the template of the letter you are sending. Must be customized in HTML or the layout will be messed up.
  2. In an Excel file that contains information (names, e-mail addresses, etc.) fields must have a first line with column names.
  3. In Word, choose Mailings→ Start Mail Merge→ E-mail Messages. If you need to interrupt or update the Excel file during the setup, click Normal Word Document and start again after making changes.
Image Removed
  1. Image Added
  2. To add a recipient file, select Select Recipients→ Use an Existing List and select an Excel file in the window that opens.
Image Removed
  1. Image Added
  2. To add fields, place the cursor where you want and select Insert Merge Field and fill in the field with the desired information.
Image Removed
  1. Image Added
  2. The result can be previewed by pressing the Preview Results button and the arrows can be used to move between letters.
Image Removed
  1. Image Added
  2. Click Finish & Merge→ Send Email Messages to start sending emails.
Image Removed
  1. Image Added
  2. A new window will open.
    To: select an email address (with the same name as the column name in the Excel file).
    Subject Line: insert the title.
    Press OK to confirm sending.
    Image Modified
  3. When the letters have been sent, it is recommended to change the settings back to the way they were before.