Page tree

University of Tartu IT wiki

Versions Compared

Key

  • This line was added.
  • This line was removed.
  • Formatting was changed.

In this guide, you can find instructions on setting up the proxy server used at the University of Tartu on a Linux device.

HTML Wrap
classbutton button1

(info) Eesti keeles


To use the proxy server, the operating system and web browser settings must be adjusted as follows:

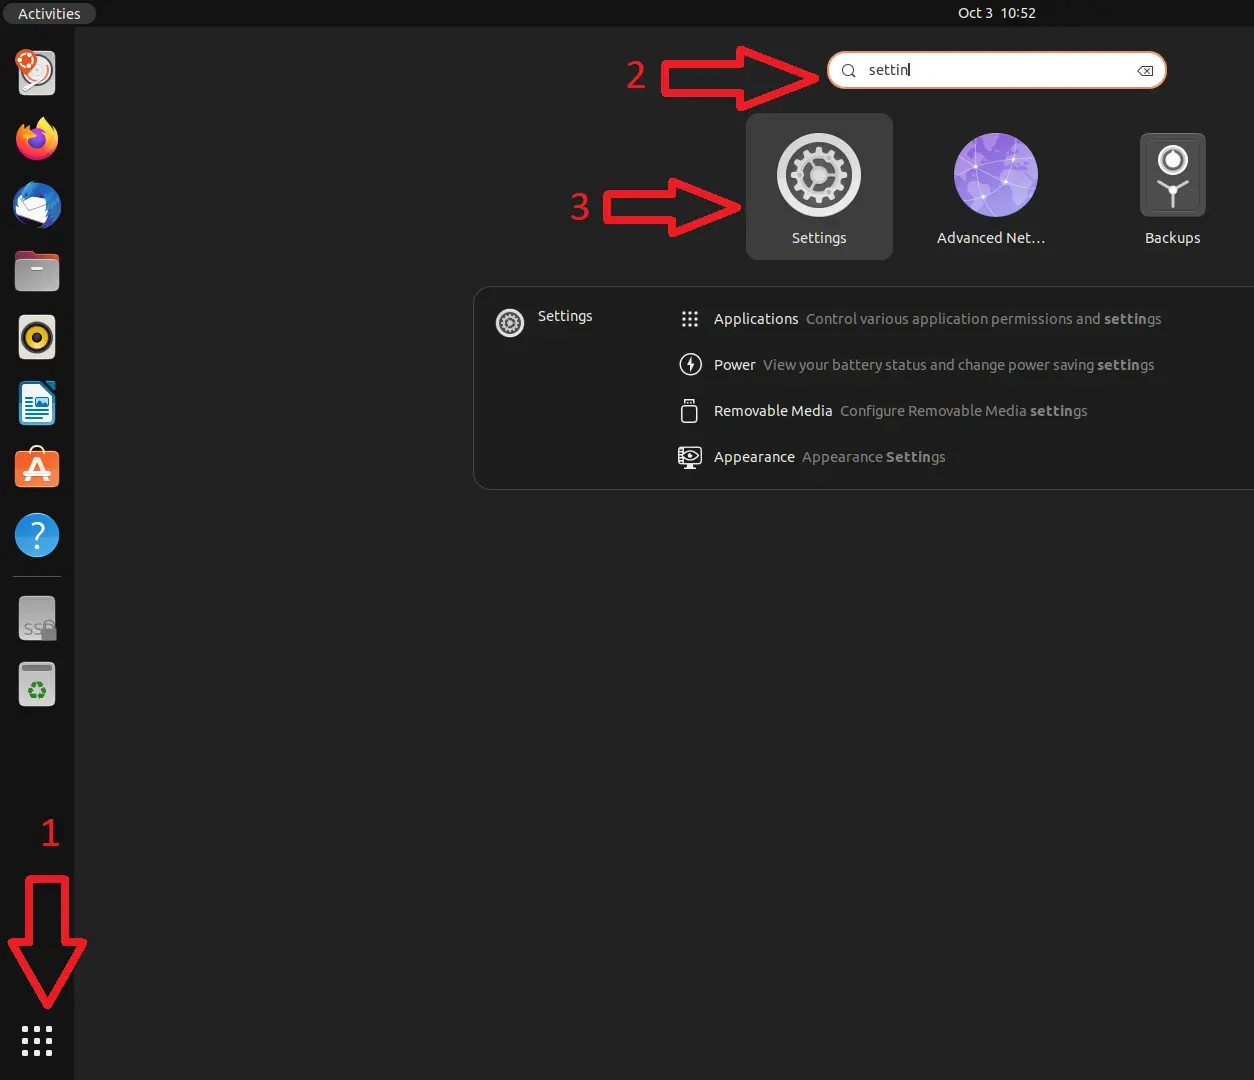
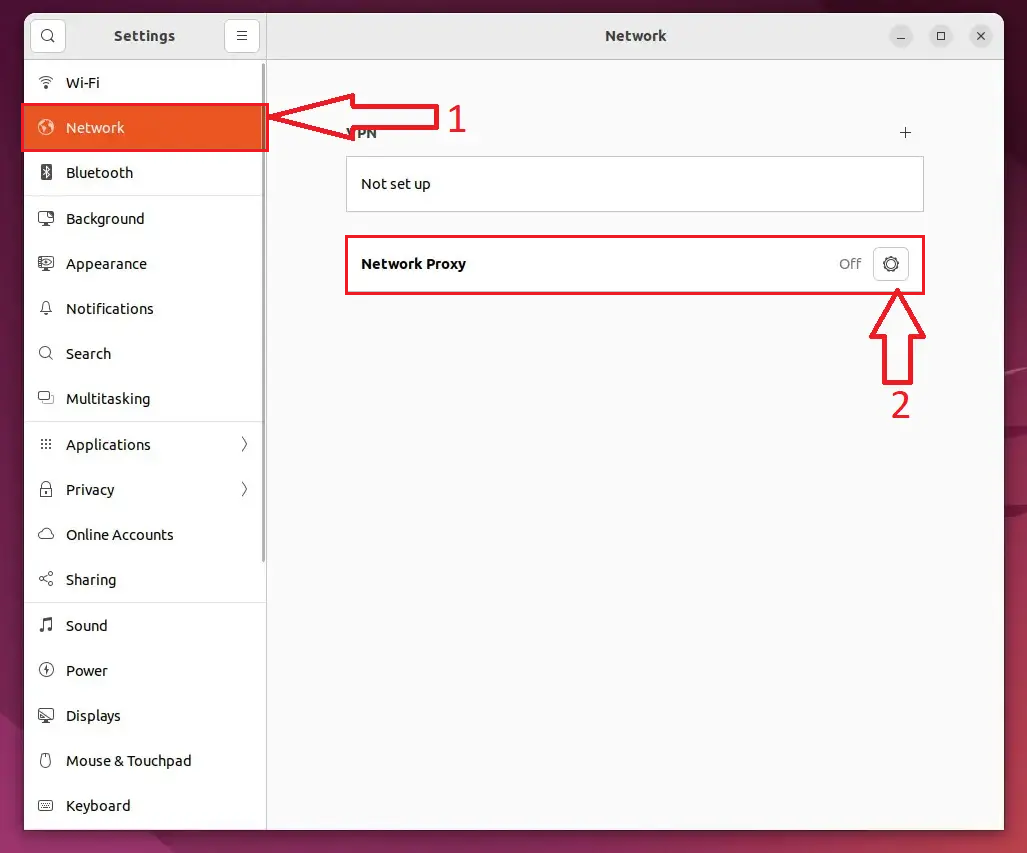
  1. Configure the proxy based on your operating system.
  2. Configure the proxy server based on your web browser.

Activate proxy settings

Expand
titleLinux
  1. Open show applications (9 dots), type Settings into the search bar and open Settings.
    open the Settings appImage Added
  2. Select Network → Network Proxy > Network Proxy settings.
    Image Added
  3. Configure:
    1. Select Automatic.
    2. In the Configuation URL field, enter http://www.ut.ee/utlib.pac.
    3. To close, click Image Added in the top right .
    Image Added


Expand
titleMozilla Firefox
  1. NB! Before setting up the proxy for Mozilla Firefox, make sure that you have set up the operating system's proxy settings.
    In the Firefox menu, select Options (three parallel lines at the top right of the screen) → Settings.
    Image Added
  2. Click the General button in the sidebar, then scroll all the way down. In the section Network Settings, click the Settings... button.
    Image Added
Note

Eestikeelne versioon asub siin: Tartu Ülikooli proxy (Linux.

Table of Contents

System proxy setup (OS X)

Mozilla Firefox

  • Choose Preferences from the Firefox menu.
    Image Removed
  • Click the Other button in the sidebar, and then click Network in the drop-down menu. Click the Settings... button in the "Connection, Firefox Internet connection settings" section.
    Image Removed
    1. In the dialog window that opens, select
    "Proxy automatic setup URL"
    1. Automatic proxy configuration URL and enter the value http://www.ut.ee/utlib.pac
    as the value in the dialog box
    1. .
    Image Removed
    1. Image Added
    2. Click OK and close the preferences dialog from the corner of the window.

    Disconnect UT Proxy

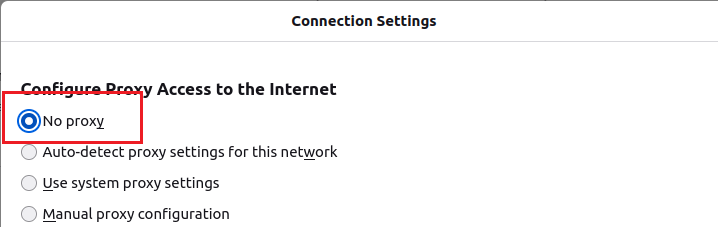
    1. To stop using the university proxy, open the same dialog and select Connect to the Internet directly"

    Google Chrome

    1. From the Chrome menu, select Settings.Image Removed
    2. Select Show advanced settings... at the bottom of the opened page.Image Removed
    3. Scroll down and find the Change proxy settings... button and click on it.
      Image Removed
    4. In the dialog window that opens, select The following proxy server automatic configuration URL is used and type http://www.ut.ee/utlib.pac in the input box.
      Image Removed

    NB! The image is illustrative, it may be different in different Linux distributions and also under different window managers or operating environments.

    Disconnect UT Proxy

    To stop using the University of Tartu


    Expand
    titleGoogle Chrome/Chromium
    1. After performing the operating system's proxy settings, Google Chrome automatically uses the system settings.

    Deactivate proxy settings

    Expand
    titleLinux
    1. Open show applications (9 dots), type Settings into the search bar and open Settings.
      open the Settings appImage Added
    2. Select Network → Network Proxy > Network Proxy settings.
      Image Added
    3. Select Disabled.


    Expand
    titleMozilla Firefox
    1. To stop using the university proxy, open the same dialog and select
    "No proxy"
    1. No proxy.
      Image Added
    2. Click OK and close the preferences dialog from the corner of the window.


    Expand
    titleGoogle Chrome/Chromium
    1. Google Chrome uses the proxy settings of the operating system (Linux). To deactivate, the Linux operating system's proxy must be deactivated.