
In this guide, you will find instructions about setting up Apple Mail on Mac.
This guide is designed to set up Apple iCloud Mail for Macbook Air, Macbook Pro, iMac and Mac Studio.
When using cloud service, applying two-factor authentication is mandatory: Activating two-factor authentication.
Guides
- From the applications toolbar, select Mail.
- In the opened window, select Microsoft Exchange and click Continue.

- Fill in the fields as following:
- Name: your name as "Tuuli Tudeng"
- Email Address: UT username as "tuuli.tudeng@ut.ee"
- Then click Sign In.

- Sign in to your Exchange account using Microsoft. To confirm, select Sign In.

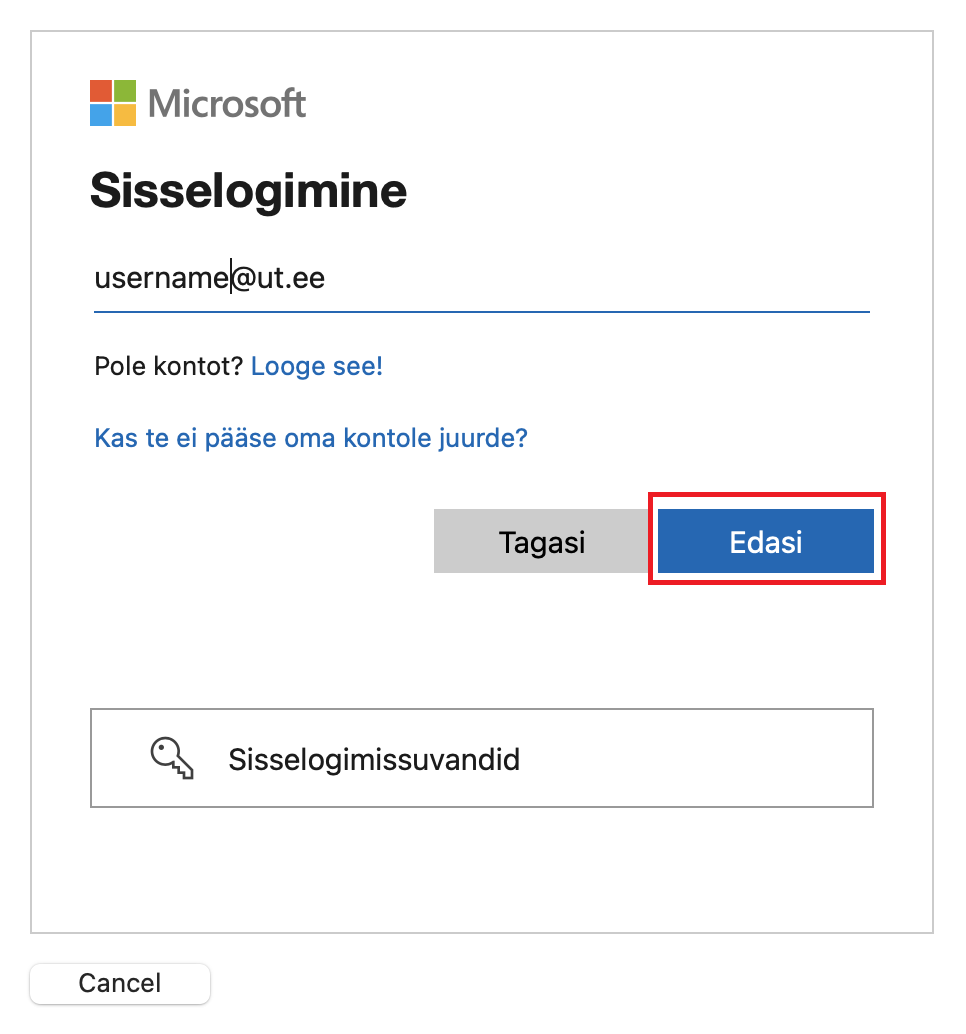
- The Microsoft sign in window opens. Enter the username as "tuuli.tudeng@ut.ee" and then press the Edasi button.
- Enter the password and press the Sisselogimine button.

- NB! If you already have 2FA authentication, you will also be asked to confirm your login.
Enter the two-step authentication code (e.g. from SMS or the Microsoft Authenticator application) and press the Kinnita.
- The Apple iCloud Mail application asks for permission to use your data. Press Nõustu to accept..

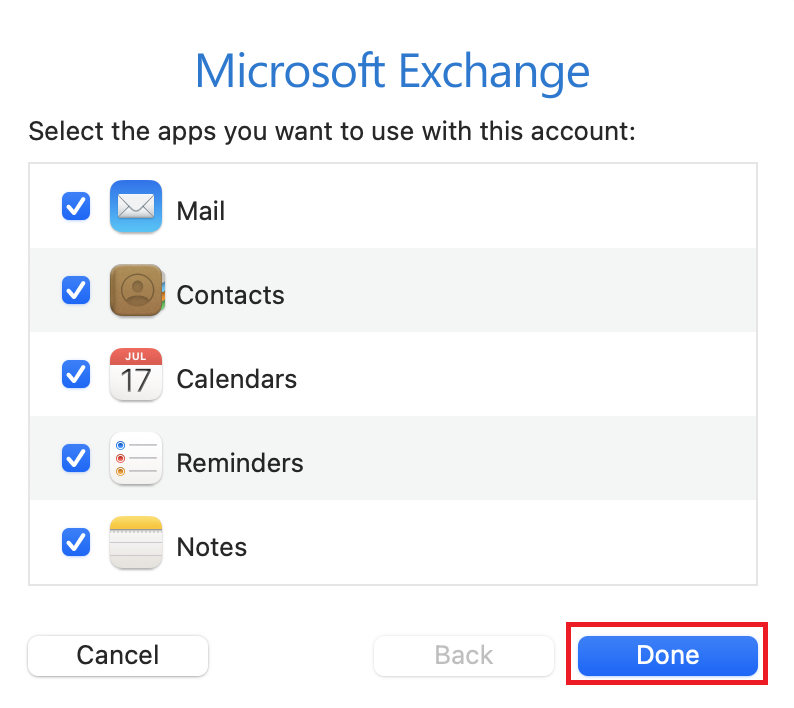
- Select the apps you want to use with your Microsoft Exchange account, then click Done.
- The latest updates are displayed, press the Continue button to proceed.

- To protect e-mail activity (hides the IP address and downloads e-mail content privately), select Protect Mail activity and press Continue.

- The UT mailbox has been successfully set up in the Apple iCloud Mail application.

- Open the Mail application.
- In the top left tab, select Mail → Settings.

- Choose a Mail account provider and click Continue.

This page has no comments.