
Eestikeelne versioon asub siin: Kasutajakonto.
Introduction
The purpose of inbox rules is to simplify sorting of incoming messages into folders.
Rules will automatically check if incoming e-mails have all the conditions met which are set up in the rule and moves the e-mails to the desired folder.
Below you can find instructions on how to set up such rules.
Creating inbox rules
Log into your e-mail account here.
- When you've logged in, choose Settings (Gear icon) on the top-right corner. Choose Mail from the bottom of the menu.
In the new menu, which opened at the left side, choose Mail → Automatic processing → Inbox and sweep rules. - Clicking on the "+" sign opens a new window where you can create a new rule for your incoming e-mails.
In the Name field write the name of your rule.
From the first drop-down menu choose a condition of the e-mail.
From the second drop-down menu choose, what to do with the e-mail which meets the rule conditions.
In the picture below is shown a rule which moves the e-mails that have the word "conference" in the subject or e-mail text into the folder "Konverents".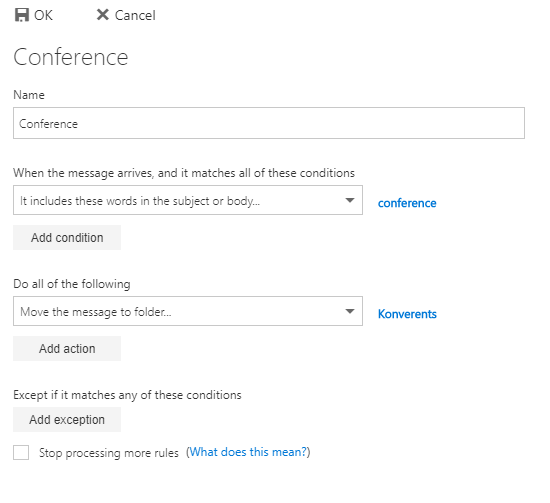
- When you've finished setting up the rule, click OK.
- If you want to temporarily disable a rule, remove the tick in front of the rule and click Save.
- If you want to delete a rule, choose the desired rule and click delete. After that, click Save.
This page has no comments.